November 13, 2011

holden patchwork squares baby quilt

while i was hard at work on my first quilt, my mind was already churning about what to make next. a very dear friend was expecting a baby (due in november), and that seemed like a perfect project (and i liked having a pretty firm deadline in mind). i had the discipline not to start working on quilt #2 until #1 was 100% complete, but in the meantime, i picked out fabrics.

i had a whole yard of a lisa dejohn animal print fabric (same one i used for my first zipper pouch) and i knew i wanted to incorporate that...those darn animals with their little cute eyes!  i knew my friend had chosen light green, yellow and chocolate brown baby bedding, so....i wanted to try to incorporate that as well.  when i went to the fabric store, i ended up picking up some lime green (!) and orange (!) filler fabrics. on paper, sounds like a crazy mish-mash, but they all blended together really well. 

i like the looks of those simply-designed patchwork square quilts, so i cut 108- 4 1/2" squares from my seven different fabrics.  the sewing of the squares and rows went very smoothly and went a lot faster than i imagined. (side note: since i worked on quilt #1 over a 3 month period, i was surprised when this whole top came together in an afternoon). the final thing ended up with 11 rows with 9 blocks & the finished size was about 36x44.

i made the back out of some leftover squares & yellow and green solids, but it looked awful. field trip to textile, where i purchased kona natural fabric & a tiny orange checkerboard print (and a chocolate brown for the binding).

i opted for horizontal straight line quilting again.  when it was complete, i washed it and sent it away to california! baby holden arrived on october 28, and i have a secret hope that this quilt will be his lifelong blankie.

November 12, 2011

my very first quilt + quilting 101 summary

several months have passed & i realized i never wrote about my quilting 101 experience. i began the class back in may as a total quilting virgin. while i had learned the basics of sewing during my spring sewing 101 session, i went into this class not knowing a single thing about quilts (and up until this point, i had it in my head that they were granny-ish and meant for country cabins).  boy, was i wrong.

during the 6-week course, we learned about piecing, quilting techniques and block designs. 
we learned how to make at least 9 different blocks which would be used to make a sampler quilt. every week, alexia taught us a new block or two, and we'd usually have to work on them independently at home throughout the week.

the initial stack of fabrics i chose to work with grew during this time - i envisioned yellow & turquoise as the predominant colors - and it was interesting to see how that evolved to include more browns. it was neat figuring out which fabric(s) would go best in which block - keeping in mind alexia's hints about scale, color and value - in order to create a nice visual harmony.

each week i grew more an more confident with my sewing machine and my fabric-cutting abilities. i checked out quilting books at the library and learned more about the history of the craft. i started reading more quilting blogs and buying more and more and more fabric. i didn't quite realize it at the time, but i was becoming obsessed.

when the class series ended, we chose a date several weeks away to reconvene. our goal was to have all of our blocks sewn together with the sashing and border- basically, complete the whole quilt top. at this point, i laid out a few different alternatives before i settled on this, which has similar blocks at opposing ends (a slight method to the madness):


it was crazy to see how it all came together.  as i sewed the sashing, i realized the importance of PINNING, PINNING and PINNING! 

quilt top, complete!

when our group got together in august, we basted our quilt sandwiches (top, batting layer, and back) and learned about the different quilting methods (hand sewing, tying, machine quilting). and that was that! we said our goodbyes and were now left to quilt the quilt on our own.

i was so scared to actually start quilting. i was afraid i'd botch it somehow and end up ruining all my hard work.  but, i had a goal in mind: textile fabrics wanted to do a display window filled with alexia's students' work, and she invited me to participate. i had about a month to finish it up.  i was honored to be asked & i couldn't pass up this opportunity.


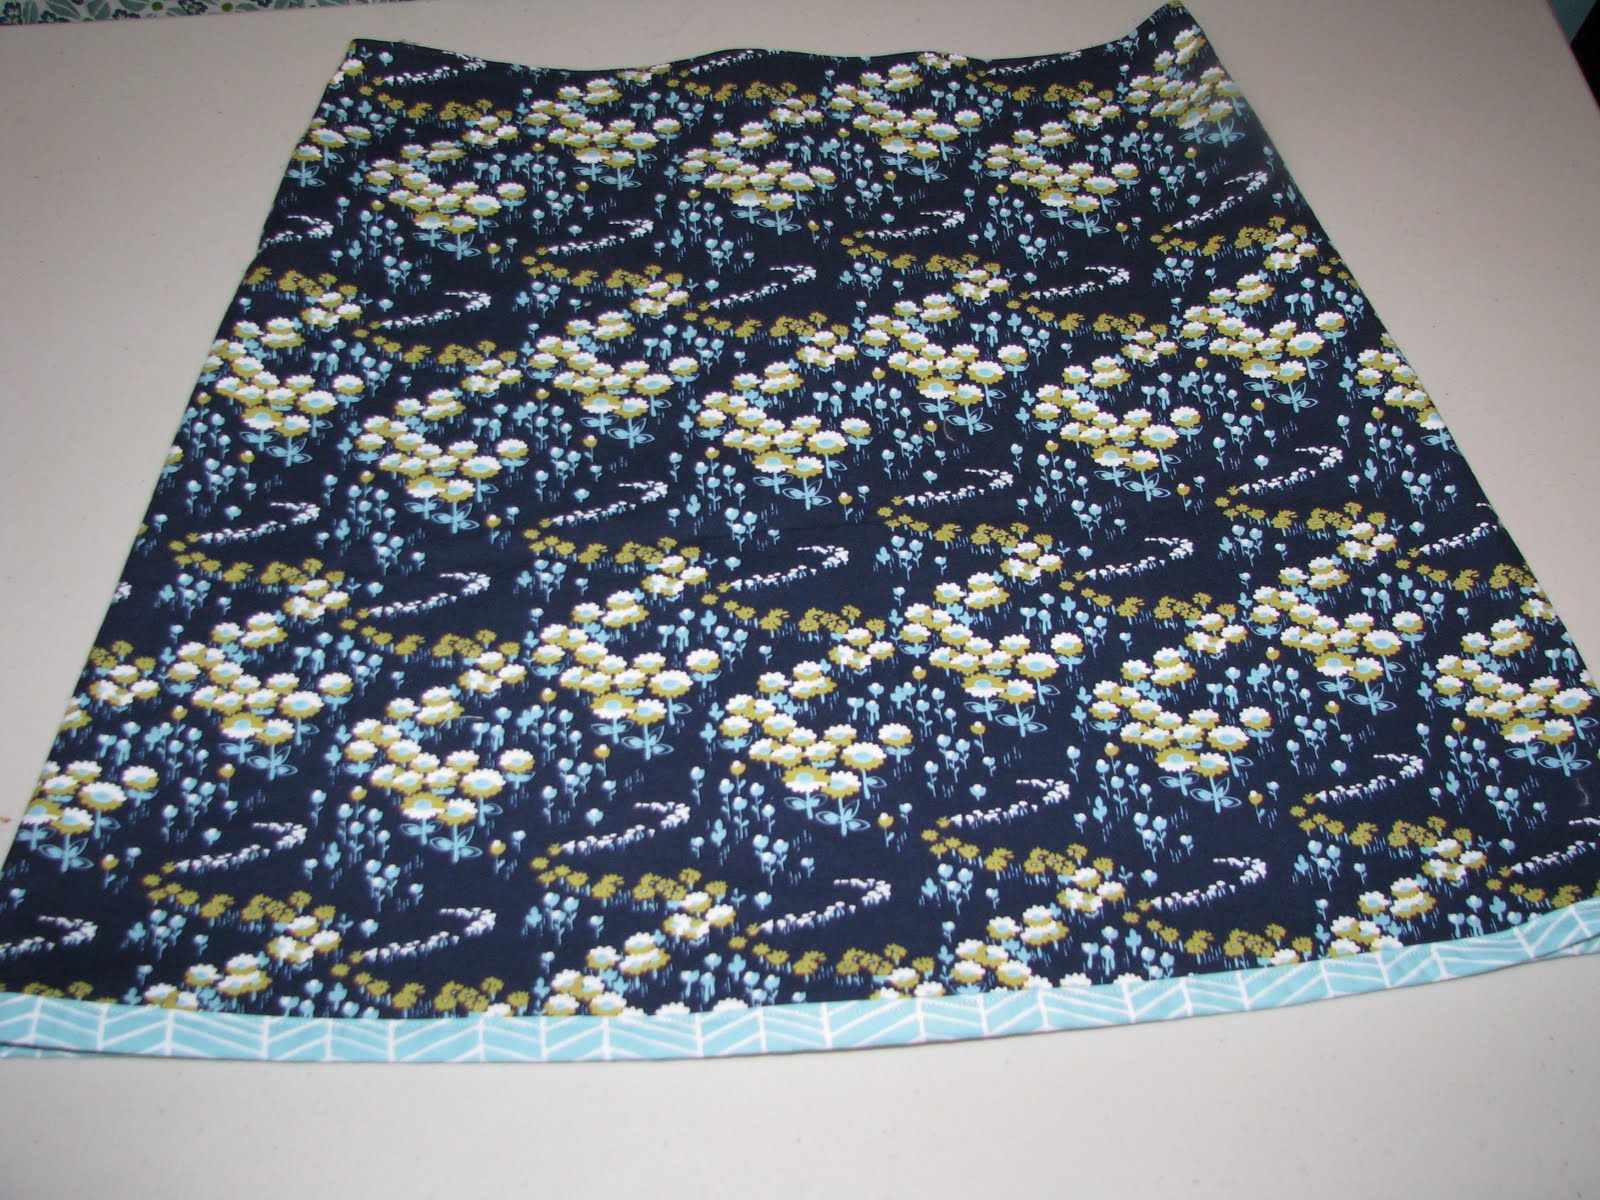
i practiced a little bit, then opted for a simple horizontal straight-line quilting pattern using a light blue gutterman thread.  because my quilt was kinda big (i don't know the exact dimensions, but it grew from having 9-blocks to 16), it was really hard to maneuver - very heavy and awkward.  as time went on, i got more comfortable. it took awhile - several days of sewing for several hours, but finally, i finished.  next up - binding!  making and sewing the binding on was easier and faster than i expected it to be. i chose a turquoise fabric with a very subtle print.
quilt back - nicey jane hop dot in 2 colors
THE QUILT
 i dropped my quilt off to alexia the next day, and a few days later, it was in the window!

at the start of 2011, i didn't know the first thing about sewing. it blows my mind that half a year later, I MADE A QUILT.  i guess that's the thing about having a passion. you spend all your spare time learning, practicing and thinking about that thing.  figuring out ways to improve and make your own mark. i feel very fortunate that i found something i love doing so much.

if you're interested in taking one of alexia's classes, learn more HERE or email her:  stitchnashville@yahoo.com

some of the fabrics i used in this quilt:

joel dewberry deer valley - floral drop in barnwood
joel dewberry modern meadow - herringbone in pond
denyse schmidt DS quilt collection for fabric traditions / joann
studio e - brooke by cp designs (biding)
heather bailey - nicey jane hop dot in sky and cream (backing & sashing fabric)
eleanor grosch - zoo menagerie - geometric green
spring street by carolyn gavin - raindrops in blue
innocent crush by anna maria horner - bubble burst in turqoise
dena designs - kumari garden sashi blue
atelier akiko - tiny dot chocolate
alexander henry - april showers

July 23, 2011

another a-line skirt

making a second skirt has been on my to-do list for awhile now (ever since i made the first one, in fact). but then i started my quilting 101 class and all other projects fell by the wayside.  i even had the fabric (one of the denyse schmidt joann prints) pre-washed & cut & ready-to-sew for several weeks.
 fabric close-up (ds quilts collection in "picnic")

last weekend i finished up my quilt top (one big round-up post documenting the whole process will follow in a few weeks, although i've excitedly shown a few people a sneak-peak picture i snapped on my iphone).  i had some free time last night so i finally got around to making the skirt. enough time has passed that i barely remembered what we did in class, so i was glad i ordered the official amy butler pattern & had the instructions to guide me. i installed the invistible zipper on the outer fabric without a hitch, but my trouble came when i had to attach this whole part to the lining.  but, it's done.  because of the length (a few inches longer than the first one i did) & the weight of the fabric & lining, it almost feels more like a fall skirt - almost a bit too heavy for these near-100-degree days.

July 14, 2011

mango salsa black beans with quinoa

mango salsa black beans with quinoa
(2 servings)
ingredients:
1 15-oz can of black beans, drained and rinsed
1/2 cup of "refrigerator"/ fresh salsa of your choice (i used chachi's mango salsa & some Mrs Renfro's Hot Habanero salsa)
1/2 cup uncooked quinoa (i used 1/4 cup red, 1/4 cup regular)

directions:
1) place your black beans in a small sauce pan. add your salsa.  cook over medium-low heat for about 15 minutes.
2) meanwhile, cook your quinoa: in a small saucepan,  add 1 cup water, 1/2 cup quinoa and a dash of salt. bring to a boil. lower heat & cover. simmer for 15 minutes.  when all the water has been absorbed, fluff with a fork.
3) to serve: put quinoa in a bowl. top with black beans.  
topping ideas: tortilla chips, avocado, cheddar cheese, sour cream, etc.

June 9, 2011

an apron - sold!

i had an impromptu yard sale last weekend & wore one of my homemade aprons to stash all the cash.  a neighbor lady inquired about it, and she ended up custom-ordering one from me! i greatly undervalued/undersold it/my time, but i was so flattered that i didn't even care.  she wanted longer wrap-around straps & 2 pockets.  i completed it minutes ago, and just rode my bike up the street to hand-deliver my very first sewing sell!
i am still getting all my ducks in a row in order to set up an etsy shop, and i will be sure to keep you posted when this idea actually comes to fruition.

May 15, 2011

the panda sews: free as a bird tote

i spotted the fabric that heather moore designed for cloud9 fabrics on a few sewing/fabric websites and instantly fell in love.  in an effort to keep my fabric purchases at bay, i held off purchasing some, although "free as a bird" was tempting me every time i trolled for fabric online.  i was surprised to see it for sale on fabric.com, and since i needed wanted to order the amy butler barcelona skirt pattern, i went ahead and picked up a yard. I LOVE IT. i knew it would pair great with some dark grey linen i got at hancock, so today i made tote bag, using the same lotta pattern i used for the mushroom tote.

note: when i made the mushroom tote, i had a hard time sewing the straps onto the bag. lotta says to attach them by sewing a rectangle - i did such a piss poor job on that thing, so i ripped up my initial stitches and re-did them {exercising more patience this time around}... it looks TONS better.  all that to say: when it came time to sew the handles onto this bag, i felt much more confident.

another note: i plan on buying some more of this fabric ASAP - i think it would make a lovely skirt!

the panda sews: a bicycle tool bag

the mister has a road bike & has been doing some distance rides (anywhere from 12-18 miles). he wanted/needed a tool bag to roll up & stash extra tubes, a pump, cell phone, etc.  (and after he got a flat tire a few weeks ago & had to walk a bit in order to find a phone to call me, the tool bag became an absolute necessity).  he found something he liked online and asked if i could try to sew him something like it.  so with this as my guide, i made him this bag (for a fraction of the cost). he picked out a sturdy railroad fabric & i went to work. it has three bigger pockets that have some "room"/dimension to them, and two small, flat pockets.  i also added a d-ring belt to tie everything together when it's all rolled up. i was kinda scared to delve into this, because it's been the first thing i've tried fully on my own without the assistance of a pattern or directions.  but it came together quite nicely and he's pretty happy with it (or so he says).

EDIT 9/2/2011: went back and re-read this - had a laugh that i noted the mister's long-distance rides were anywhere between 12-18 miles. since then, his riding skills have VASTLY improved and he averages 40-60 miles per day and he's also completed a century). 

May 7, 2011

the panda sews: an a-line skirt


the final installment of my sewing class was held today. i went in with 1 1/4 yards of fabric and a zipper, and five hours later, i left with a skirt.  it boggles my mind that i was able to make something i could actually wear.  dare i say, it's better quality than the clothes at old navy (though that's probably not saying very much).  we followed the amy butler barcelona a-line skirt pattern, and i chose a joel dewberry fabric called "floral fields" for my main fabric. i made a trim at the bottom, since i didn't really want to hem the bottom up (i didn't want the finished skirt to be any shorter). yippppeeee!  i definitely plan on making another skirt or two in the near future...
don't my knee caps look funny?

May 5, 2011

the panda sews: a chicken apron


my sister carrie has chickens & she loves the heck out of them, so as an early mother's day gift, i made her a chicken apron, using fabric from alexander henry's farmdale collection (i love the way the 'crosshatch sage' partners with the chickens! you can find it all over the 'net, but i was also surprised to see it at joann). i reinforced the pockets with some decor bond fusible interfacing, figuring she could fill them with chicken snacks. 

she's a fantastic mother to humans and chickens (and dogs and rabbits) and the most positively influential older sister a person could imagine.  i've never known anyone with a bigger heart. happy mother's day, carrie!i love you!

May 3, 2011

a sailor zipper pouch


i was really quite smitten with this sailor boy fabric i picked up at textile (it can also be found online at superbuzzy, which is my favorite place for all those cute japanese prints).  those lil' sailors are just so cute and tiny, with their miniature flags and sailboats and anchors.   since i only bought 1/4 yard and i wanted a quick-ish project to work on tonight, i decided to go with a zipper pouch. i lined it with a navy-with-white-polka-dot fabric i got at hancock fabrics.  the final bag ended up around 10" x 7", so now i just have to figure out what i'm going to use it for.

May 1, 2011

a mushroom totebag


i wanted to try something out from my lotta jansdotter's simple sewing book, so i made another tote bag.  i used the same natural-colored linen from the raindrop tote & a mushroom fabric i picked up at jo-ann. i'm not 100% happy with how this one turned out - the tote isn't lined (nor does it require interfacing for added stability), so it doesn't feel as strong as some of the other stuff i've made. and her method of sewing on the straps left some unsightly stitches (although this is totally my own fault. it definitely would've helped if i had used a green thread to match the fabric rather than the white).  i'll probably end up adding some sort of trim or ribbon to cover it up.  all in all, i had more success with this tote bag method.

on a side note, i found a crazy-good rowenta professional iron at the goodwill for $6.99 (refurbished/used ones still sell for $75), so that was a total score!  way better than my previous iron.

edit: a few weeks after i made this, i pulled out my "unsightly stitches" and re-did it. i am now officially 100% happy with the results.

April 29, 2011

linen tote bag w/ appliques

class was canceled AGAIN last saturday, so i've been doing quite a bit of home sewing over the past few weeks. i made a few aprons and have toyed with the idea of opening up an etsy shop. in my "ideal fantasy" world, this would give me some extra funds i could use toward fabric-buying (wait, i guess in my ideal fantasy, i'd already have enough money to buy tons and tons of fabric...and i'd live on a beach.)  but it's still an idea at this point - i'd like to get a bit of an inventory built up- so stay tuned for updates. i guess i want to make sure i'm 100% satisfied with my product. 

i wanted to work on something else yesterday, and this tutorial really caught my eye (linen! little raindrops!) plus it would give me a chance to learn a few new things (sewing with linen & making appliques).


notes:
  • this is one of the best tutorials i've ever seen online - helpful pictures, easy-to-follow directions, etc.
  • seriously, be patient sewing the appliques, esp. the tiny raindrops. i used the hand-crank (she offers this advice in a different tutorial: When sewing around smaller, tighter curves or circles: I sew these in a very slow and methodical way, sometimes just a stitch or two at a time if necessary. I’ll sew one or two stitches, then, with the needle in the down position, lift up the presser foot, turn the fabric slightly, then put the presser foot back down and go another stitch or two. Sometimes I’ll even just use the hand wheel on the side of the machine to move the needle to avoid accidentally shooting ahead a few stitches with the foot pedal. I’ll repeat this process typically for just the tightest part of the curve, and get back to a normal speed whenever I can. 
  • full disclosure: the brown cloud is actually covering up my first botched applique attempt. same with the lightest-colored raindrop.  i was able to create slightly bigger versions and go over my 'mistakes'.  i tried hand-sewing them too, but it looked too sloppy.
  • i love the look of natural-colored linen, but it sure is wrinkly.
  • i can't hear the word "applique" without thinking of this song.  "designer jeans with appliques on it"  

edit: i added a trim to the top. here's what it looks like now:

April 19, 2011

a big tote bag

when last we met, i had begun work on a tote bag in my sewing class. the next class ended up being postponed because the air conditioner wasn't working (and on an 85 degree day in a 2nd floor old house, you really need A/C...) but we were back on track on the 16th and i finished up the bag:
i chose a deep purple, floral fabric (to counteract all that cute animal stuff i'd been using, i suppose).  it's lined in aqua and has 2 big pockets, with some little pockets sewn onto the big ones (see photo below).  the bag could be reversible, but i sewed down the corners (much like i did for the produce bag) to add some depth. all and all, i'm very pleased with it.
"inside" of the bag

i've also been making some more wallets. i did a cute tree one for my good ol' buddy liz (didn't snap a picture)...and this rooster one:
 my fabric stash is getting slightly out of hand:
our final class is the 23rd...skirt!  in the meantime, i need to figure out if i'm going to take sewing 102 or quilting 101...

April 2, 2011

zipper pouches

during last week's class, we made a zipper pouch. i used an awesome animal print (tiger! octopus! chicken! elephant! they have eyelashes & they're all hanging out on the same fabric!) and lined it with a brown w/ white polka-dot print. i felt really discombobulated and out-of-sorts during class, and ended up messing up my zipper piece 3 times (we sew a little piece of fabric to the ends of the zipper) AND i measured the fabric wrong for my size zipper. my zipper foot for the machine was a little wonky, so that played a (small) part in my error(s), but 99% of it was my fault.  and when i finally finished it, i realized i had sewn the fabric too close to the zipper and it didn't zip all the way open. boo. definitely not my proudest day. (side note: the next day, i got a migraine, so at least there was a reason i felt like a pyschopath).

l-r: carrie, courtney, katie. zipper pouches for sisters three! 

i decided to not let the day's failures prevent me from trying again, so i made 2 more pouches for my sisters. everything went swimmingly. the purple spotted fabric is carrie's (i lined it with a solid plum purple) and the panda/pig one is courtney's (lined with brown w/ white polka dots).  everything went really well making those two, so i decided to re-do my own animal pouch. more trouble!   (i'm beginning to think that fabric is cursed, but then again, it was 1am at that point). i finally wound up with something i'm proud of.

last night, my pal/classmate julia & i wanted some more practice before today's class, so after eating and playing some ms pac man at her house (they have many arcade video game machines!!!), i made this for my mother-in-law. it's lined with plain navy blue & has a grey zipper:


today's class was spent measuring out all the fabric for a tote bag, which we'll complete next week...

March 19, 2011

fabric produce bag

week 3's sewing class was canceled today, so i went to the franklin farmer's market & brunch with a pal, did a little shopping (bought nothing), and hung out with big sis carrie and nephew elliott (went to e's baseball practice & indian food for dinner...no complaints there! perfect way to spend this lovely-weathered day).

i don't want to lose what (little) sewing chops i have, so i decided to tackle a new project (rather than falling back on the two things i already know how to do: folding wallet & pillow).  i found this pretty easy & free .pdf pattern for a fabric produce bag, so i grabbed my least favorite fabric from my stash (in case i messed up) and one hour later churned out this:
now that me and my sewing machine are on a somewhat friendly basis, i think my next hurdle will be reading/understanding patterns. it's easier for me to have a human show me what to do rather than deciphering pattern directions (i'm totally owning up to this being my own fault/problem, and it has nothing to do with the pattern-makers themselves). it takes me a second (or ten) to get it. and when i finally do, i think, "duh, katie!"  it was neat to try out a bag with depth and handles. and now i can add this to the ever-growing list of "things i can make."  but i am certainly looking forward to a human lesson next week.

March 13, 2011

pillows part 2 and wallets

wow, it really has been about a year since i sewed my first pillows. since then, my sewing machine has been sad and lonely, and every once in awhile i'd glance at it and wonder when i'd feel comfortable touching it again. when i learned about STITCH classes  (taught by alexia abegg in a studio above local honey on belmont blvd), it seemed like the perfect (and affordable) thing to get me (back?) into sewing. i am currently enrolled in sewing 101, and with 2 classes under my belt, i have a newfound enthusiasm.  all i can think about is sewing and fabric. i can't remember the last time i had such fervor for a creative art. and it feels so nice!

the night before the first class, i (tried to) reacquaint myself with my sewing machine. but it was like running into someone you've only talked to once, then you see them again and you're forced to make (awkward) conversation. it was uncomfortable and i treaded very lightly around the threading mechanism.

during the first class, i was still a little nervous, but in the end, i walked out with a little (lopsided) pincushion. i practiced some more the next day (after a trip to hancock fabric in murfreesboro, where once again i had to sort through 90% crap to find the 10% awesome that store has to offer).

friday night i made this pillow (this is a good tutorial), and after doing so, i felt WAY more confident on my sewing machine.

we made wallets during saturday's class, and i was excited to use this super adorable bear fabric i bought at textile fabrics (unlike hancock, textile is 90% awesome and i have a hard time restraining myself).

tonight, i used this strange fabric (butcher & the baker!) to make the mister a wallet:


next week, zipper pouches. then a tote bag & an a-line skirt. huzzah!